Quick Answer: Frametime spikes are temporary delays in frame delivery that cause visible stuttering even when your average FPS remains high. A frametime spike happens when one frame takes significantly longer to render (50ms instead of 16ms), creating a noticeable hitch in gameplay. High FPS measures average performance, but frametime consistency determines smoothness. That’s why 144 FPS can still feel choppy if frametime spikes frequently, stable 90 FPS with consistent frametimes feels smoother than unstable 144 FPS with spikes.
If your game shows high FPS (100-144+) but still stutters, hitches, or feels choppy, you’re experiencing frametime instability. This isn’t low performance it’s inconsistent frame delivery. The fixes below target the specific causes of frametime spikes, not general low FPS problems.
Want just the fastest fixes without the explanation? Read Stuttering at 144 FPS? Fix It in 15 Minutes instead.
What Are Frametime Spikes? (30-Second Explanation)
Frametime is the time it takes your PC to render one single frame, measured in milliseconds (ms).
A frametime spike happens when one frame takes significantly longer to render than the frames around it. That delay creates visible stuttering even when your average FPS remains high.
Example of Smooth vs Stutter Gameplay:
Smooth 60 FPS:
Frame 1: 16.6ms
Frame 2: 16.6ms
Frame 3: 16.6ms
Frame 4: 16.6ms
Result: Consistent delivery = smooth gameplay
Stuttery 60 FPS (with spike):
Frame 1: 16.6ms
Frame 2: 16.6ms
Frame 3: 50ms (spike!)
Frame 4: 16.6ms
Result: Still averages 60 FPS, but Frame 3’s delay creates visible stutter
This is why:
– High FPS doesn’t guarantee smooth gameplay
– 144 FPS can still feel choppy
– Mouse movement can feel inconsistent
– Competitive games feel less responsive despite high framerates
– “Feels worse than the numbers suggest”
Frametime consistency matters more than average FPS for perceived smoothness.
Do You Have Frametime Spikes? (Quick Self-Check)
You likely have frametime spike issues if:
Performance vs Feel Mismatch:
✓ FPS counter shows 100-144+ but gameplay feels choppy
✓ Performance “feels worse” than the FPS number suggests
✓ Mouse movement feels inconsistent or uneven despite high FPS
✓ Camera panning looks jittery or stuttery
✓ Competitive games feel less responsive than they should
Visual Symptoms:
✓ Brief hitches or micro-stutters every few seconds
✓ Smooth gameplay interrupted by sudden frame skips
✓ Loading new areas causes momentary freezes (traversal stutter)
✓ Entering cities or dense areas creates periodic hitching
✓ Weather changes or time-of-day transitions cause brief pauses
Scenario-Based Indicators:
✓ Gameplay feels smooth for minutes, then sudden hitch, then smooth again
✓ Certain actions trigger stutters (opening inventory, looking at specific areas)
✓ First playtime in new areas stutters more than repeated visits
✓ Alt-tabbing back into game causes brief stuttering
✓ Performance worsens with overlays (Discord, GeForce Experience) enabled
Hardware Context:
✓ You have capable hardware (RTX 3060+, RX 6700+, or equivalent)
✓ Other games run smoothly at similar settings
✓ CPU and GPU usage don’t consistently hit 100%
✓ Temperatures are normal (GPU under 85°C, CPU under 90°C)
Not Frametime Issues If:
If FPS is consistently low (30-60 FPS everywhere): This is a performance problem, not frametime spikes. Read Low FPS on a High-End PC? Fix It in 15 Minutes for general performance optimization.
If stuttering only happens in one specific game: Likely game-specific optimization issues or bugs, not general frametime problems.
If stuttering started after Windows update: Might be Windows 11-specific conflicts. Read Fix Windows 11 Stuttering in 20 Minutes for Windows optimization.
Confirmed you have frametime spikes? Continue to the explanation below.
What Causes Frametime Spikes?
Frametime spikes are caused by temporary interruptions in frame delivery. These are the 8 most common causes:
1. GPU Saturation (98-100% Usage)
When your GPU hits maximum capacity, it can’t maintain consistent frame pacing. Even one demanding frame causes a delay that creates a visible spike.
Symptoms: High average FPS but periodic hitches, especially in visually complex scenes
2. CPU Thread Bottlenecks
Modern games often rely heavily on one or two CPU threads for world simulation, physics, or AI. When that thread maxes out, frame submission to the GPU gets delayed.
Symptoms: Stuttering in cities, crowded areas, or during complex physics events
3. Shader Compilation
DirectX 12 and Vulkan games compile shaders during gameplay. The first time you encounter a new effect, area, or weather condition, the game pauses briefly to compile shaders.
Symptoms: First-visit stuttering in new areas, smooths out on repeated visits
4. Thermal Throttling
When CPU or GPU temperatures exceed safe thresholds (typically 85°C for GPU, 90°C for CPU), the component reduces clock speed to cool down. This sudden performance reduction creates frametime spikes.
Symptoms: Smooth gameplay for 10-30 minutes, then periodic stuttering as temps climb
5. Storage Bottlenecks (Asset Streaming)
Open-world games stream assets (textures, models, terrain) from storage continuously. If your drive can’t keep up, the game pauses briefly waiting for assets to load.
Symptoms: Stuttering when moving quickly through environments, especially on HDD or slow SATA SSD
6. Background Process Spikes
Windows updates, antivirus scans, file indexing, or other background tasks briefly consume CPU/GPU resources, delaying game frame rendering.
Symptoms: Random periodic hitches with no pattern, worsens with many background apps
7. Overlay Conflicts
Discord overlay, GeForce Experience, Steam overlay, or browser hardware acceleration can interrupt frame presentation timing, creating micro-stutters.
Symptoms: Stuttering worsens with overlays enabled, disappears when disabled
8. Driver Issues
Outdated, beta, or unstable GPU drivers may fail to schedule frame rendering consistently, creating irregular frame delivery.
Symptoms: Stuttering across multiple games, often resolves after driver update or rollback
Why High FPS Still Stutters: Understanding the Difference
High FPS Does Not Equal Smooth Gameplay
Average FPS only measures how many frames your PC renders per second on average. It doesn’t measure frame delivery consistency.
Example: Two Systems Both Showing “144 FPS”
System A – Smooth:
Every frame renders in 6.9ms consistently
Frame delivery: 6.9ms, 6.9ms, 6.9ms, 6.9ms, 6.9ms
Result: Perfectly smooth gameplay
System B – Stuttery:
Average frametime is 6.9ms, but with spikes
Frame delivery: 6.9ms, 6.9ms, 6.9ms, 30ms, 6.9ms, 6.9ms, 6.9ms, 6.9ms, 40ms
Result: Choppy gameplay despite identical average FPS
Both systems show “144 FPS” on the FPS counter, but System B feels terrible because of frametime inconsistency.
This is why:
– Stable 90 FPS can feel smoother than unstable 144 FPS
– FPS counters don’t tell the full story
– Frametime graphs are essential for diagnosing stuttering
– Professional players often cap FPS for consistency rather than chasing maximum numbers
How to Diagnose Frametime Spikes (30-Second Test)
Before applying fixes, confirm you actually have frametime spikes:
Tools You Need:
– MSI Afterburner (free)
– RivaTuner Statistics Server (bundled with Afterburner)
Setup (One-Time, 2 Minutes):
1. Install MSI Afterburner
2. Open settings
3. Enable on-screen display
4. Add these metrics:
– Frametime graph
– GPU usage %
– CPU usage %
– GPU temperature
– CPU temperature
What to Look For in the Frametime Graph:
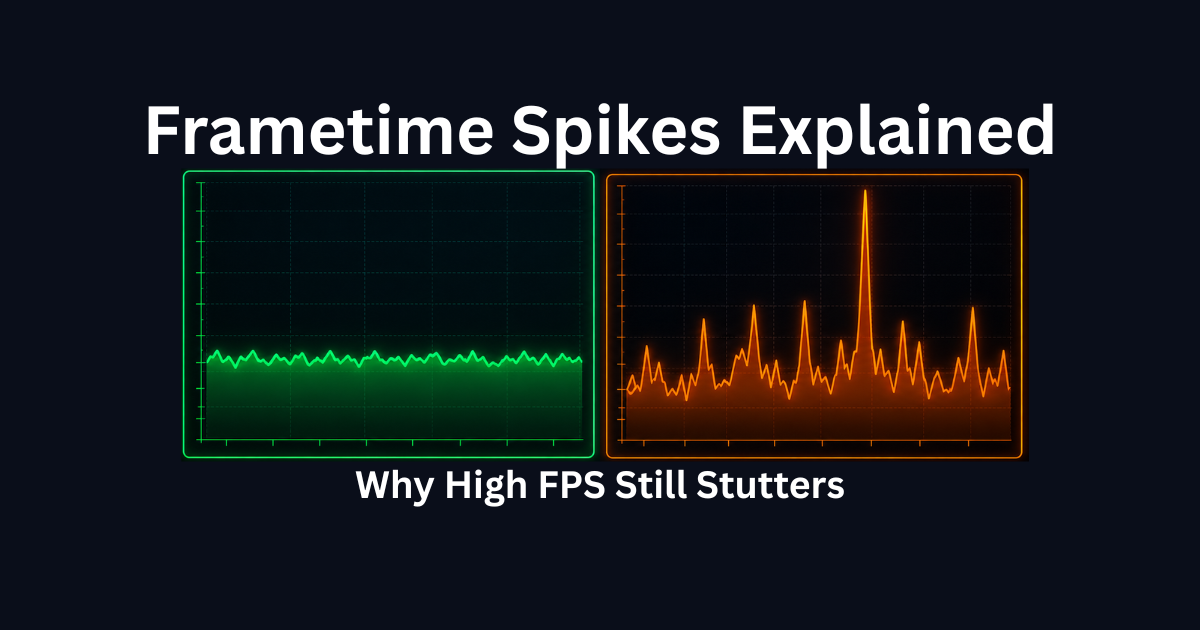
Smooth Gameplay = Flat Line:
The frametime graph shows a mostly flat, consistent line with minimal variation. Small bumps are normal.
Stuttery Gameplay = Spikes:
The frametime graph shows large vertical spikes (2-3x higher than baseline). These spikes correlate with visible stuttering.
Example Readings:
– Baseline: 6-7ms frametimes (144 FPS)
– Spike: 30-50ms frametime = visible stutter
– If spikes happen frequently (every few seconds), you have frametime issues
If you see frequent spikes, continue to the fixes below.
Step 1: Check for GPU Saturation (Most Common Cause)
Time: 5 minutes
Impact: Very High
GPU saturation happens when your GPU runs at 98-100% capacity constantly. Even minor additional load causes frametime spikes.
How to Check GPU Saturation:
1. Enable GPU usage % in MSI Afterburner overlay
2. Play your game normally
3. Watch GPU usage during gameplay
What You’re Looking For:
– GPU usage consistently at 98-100%
– Frametime spikes correlate with usage hitting 100%
If GPU Usage Stays at 98-100%:
This is GPU saturation. Your GPU is maxed out and can’t maintain consistent frame pacing.
Fix Options (In Order of Effectiveness):
Fix 1A: Lower Graphics Settings
Reduce these settings first (biggest GPU impact):
– Resolution: 4K → 1440p or 1440p → 1080p
– Ray Tracing: OFF (huge GPU load)
– Shadow Quality: Ultra → High or Medium
– Reflection Quality: Ultra → High
– Anti-aliasing: MSAA 8x → MSAA 2x or FXAA
Target: GPU usage 85-95% for consistent frametimes
Fix 1B: Enable DLSS/FSR/XeSS
If your game supports upscaling:
– DLSS (NVIDIA): Quality or Balanced mode
– FSR (AMD/Universal): Quality mode
– XeSS (Intel/Universal): Quality mode
This renders at lower resolution internally, reducing GPU load while maintaining visual quality.
Fix 1C: Cap Your FPS
Capping FPS slightly below maximum prevents GPU from constantly maxing out:
– 144Hz monitor → cap at 138-141 FPS
– 165Hz monitor → cap at 160-163 FPS
– 240Hz monitor → cap at 235-237 FPS
Consistent 90% GPU usage feels smoother than fluctuating 98-100%.
What to Expect:
– Reduced or eliminated frametime spikes
– More consistent frame pacing
– Smoother gameplay feel despite slightly lower average FPS
Step 2: Identify CPU Thread Bottlenecks
Time: 5 minutes
Impact: High
CPU thread bottlenecks happen when one CPU core maxes out while others sit idle, delaying frame delivery to GPU.
How to Check for CPU Thread Bottlenecks:
1. Enable CPU usage % in MSI Afterburner
2. Open Task Manager > Performance > CPU
3. Right-click graph > Change graph to > Logical processors
4. Play your game
What You’re Looking For:
– One or two cores at 90-100% usage
– Other cores at 30-60% usage
– Frametime spikes correlate with high single-thread usage
Common Scenarios That Cause CPU Thread Bottlenecks:
– Cities or crowded areas (NPC AI, crowd simulation)
– Physics-heavy scenes (explosions, destruction)
– Large-scale battles (strategy games, MMOs)
– Open-world games loading assets
– High refresh rate gaming (240Hz+)
If You Have CPU Thread Bottlenecks:
Fix 2A: Lower CPU-Heavy Settings
Reduce these settings (biggest CPU impact):
– NPC density: High → Medium
– Draw distance: Ultra → High
– Shadow distance: Far → Medium
– Physics quality: High → Medium
– Crowd detail: High → Low
Fix 2B: Close Background Applications
CPU-heavy background processes worsen thread bottlenecks:
– Chrome/browser (especially with many tabs)
– Discord (disable hardware acceleration in settings)
– Streaming software (OBS, StreamLabs)
– RGB software (can use 5-10% CPU)
– Multiple game launchers
Fix 2C: Enable Game Mode (Windows 11)
Windows 11 Game Mode prioritizes game threads:
– Settings > Gaming > Game Mode > ON
Fix 2D: Check for High Performance Power Mode
– Settings > System > Power > Best Performance
What to Expect:
– Smoother performance in CPU-heavy scenes
– Reduced stuttering in cities and crowded areas
– More consistent frametimes during complex events
Step 3: Clear Shader Cache (Fixes Compilation Stutter)
Time: 5 minutes
Impact: Very High for DirectX 12/Vulkan Games
Shader compilation stutter happens when games compile shaders during gameplay, especially in DirectX 12 and Vulkan titles.
Symptoms of Shader Compilation Issues:
– First-time stuttering in new areas
– Stuttering when seeing new visual effects
– Traversal stutter (moving between zones)
– Smooths out after playing the same area repeatedly
– Worse in Unreal Engine 5 games
How to Clear Shader Caches:
Clear DirectX Shader Cache:
1. Press Windows Key
2. Search: Disk Cleanup
3. Select C: drive
4. Check “DirectX Shader Cache”
5. Click OK
NVIDIA Users – Clear Driver Cache:
1. Open NVIDIA Control Panel
2. Manage 3D Settings
3. Click “Restore” (restores defaults and clears cache)
4. Apply
AMD Users – Clear Graphics Cache:
1. Open AMD Software
2. Gaming > Global Graphics
3. Click “Reset”
4. Restart PC
What to Expect After Clearing:
– First 10-15 minutes of gameplay will stutter MORE (shaders rebuilding)
– After initial rebuild, traversal stutter significantly reduces
– Smoother performance in new areas
– Less hitching during visual effect changes
This fix is especially effective for:
– Unreal Engine games
– DirectStorage titles
– Games that stutter more on first playthrough
Step 4: Check Thermals (Thermal Throttling Test)
Time: 10 minutes
Impact: High If Overheating
Thermal throttling creates frametime spikes when components reduce clock speed to cool down.
How to Monitor Temperatures:
1. Enable GPU temp and CPU temp in MSI Afterburner
2. Play your game for 15-20 minutes
3. Watch temperatures during gameplay
Safe Temperature Ranges:
– GPU: Under 85°C (ideal: 70-80°C)
– CPU: Under 90°C (ideal: 65-80°C)
If Temperatures Exceed Safe Ranges:
GPU Overheating (85°C+):
– Clean dust from GPU fans and heatsink
– Improve case airflow (add intake/exhaust fans)
– Increase GPU fan curve in MSI Afterburner
– Check thermal paste age (reapply if PC is 3+ years old)
– Reduce GPU overclock if applied
CPU Overheating (90°C+):
– Clean dust from CPU cooler
– Reapply thermal paste
– Verify CPU cooler is mounted correctly
– Check that CPU cooler fan is spinning
– Improve case airflow
What to Expect:
– Elimination of progressive stuttering (smooth start, choppy after 15-30 min)
– Consistent performance throughout gaming sessions
– No sudden framerate drops mid-gameplay
Step 5: Test Storage Performance (Asset Streaming)
Time: 5 minutes
Impact: Critical for Open-World Games
Storage bottlenecks cause frametime spikes when your drive can’t stream game assets fast enough.
Symptoms of Storage Bottlenecks:
– Stuttering when moving quickly through environments
– Texture pop-in delays
– Hitching during fast travel or loading transitions
– Worse in open-world games
– Significantly worse on HDD
How to Check Your Drive Type:
1. Open Task Manager
2. Performance tab
3. Select your game installation drive
4. Check drive type listed at top
Drive Performance Hierarchy:
– HDD (Hard Disk Drive): 100-150 MB/s = Severe stuttering in modern games
– SATA SSD: 500-550 MB/s = Playable but occasional hitching
– NVMe SSD: 3,500-7,000 MB/s = Smooth asset streaming
If Your Game Is on HDD or Slow SATA SSD:
Option 1: Move Game to Faster Drive
Steam:
– Library > Right-click game > Properties
– Installed Files > Move Install Folder
– Select NVMe drive
Xbox App:
– Library > Right-click game > Manage
– Move to NVMe drive
Option 2: Upgrade to NVMe SSD
If you don’t have an NVMe SSD:
– Budget option: 500GB NVMe ($60-80)
– Mid-range: 1TB NVMe ($90-120)
– Performance: PCIe 4.0 NVMe ($110-150)
Games That Benefit Most from NVMe:
– Forza Horizon series
– Spider-Man (PC)
– Ratchet & Clank
– Star Citizen
– Cyberpunk 2077
– Any DirectStorage-enabled game
What to Expect:
– Elimination of traversal stutter
– No texture pop-in delays
– Smooth fast travel and zone transitions
– Consistent performance during high-speed movement
Step 6: Disable Overlays and Background Processes
Time: 10 minutes
Impact: Medium to High
Overlays and background processes interrupt frame presentation timing, creating micro-stutters.
Which Overlays Cause Frametime Spikes:
– Discord overlay
– GeForce Experience overlay
– Steam overlay
– Xbox Game Bar
– Browser hardware acceleration
– RGB software (Corsair iCUE, Razer Synapse)
How to Disable Overlays:
Discord Overlay:
1. User Settings (gear icon)
2. Game Overlay
3. Toggle OFF “Enable in-game overlay”
GeForce Experience Overlay:
1. Settings (gear icon)
2. General
3. Toggle OFF “In-Game Overlay”
Steam Overlay:
1. Settings > In-Game
2. Uncheck “Enable Steam Overlay”
Xbox Game Bar:
1. Settings > Gaming > Xbox Game Bar
2. Toggle OFF
Disable Browser Hardware Acceleration:
Chrome/Edge:
1. Settings > System
2. Toggle OFF “Use hardware acceleration”
Background Process Priority:
Close these before gaming:
– Chrome/browsers (especially with many tabs)
– Streaming software (OBS when not streaming)
– File sync (OneDrive, Dropbox, Google Drive)
– Torrent clients
– RGB software (if not needed)
What to Expect:
– Reduced micro-stuttering
– More consistent frame pacing
– Lower 1% lows
– Smoother overlay-free experience
Step 7: Update or Rollback GPU Drivers
Time: 15 minutes
Impact: High
Driver issues cause inconsistent frame scheduling and delivery.
When to Update Drivers:
– Drivers are 3+ months old
– New game just released
– Recent Windows update occurred
– Stuttering started after driver update
When to Rollback Drivers:
– Stuttering started immediately after driver update
– Performance was smooth on previous driver version
How to Update GPU Drivers:
NVIDIA:
1. Download NVIDIA App or GeForce Experience
2. Check for driver updates
3. Choose “Custom Installation”
4. Check “Perform clean installation”
5. Install and restart
AMD:
1. Download AMD Software
2. Check for updates
3. Choose “Factory Reset” during installation
4. Install and restart
Intel Arc:
1. Visit intel.com/content/www/us/en/download-center
2. Download latest Arc driver
3. Install and restart
How to Rollback Drivers:
1. Device Manager
2. Display adapters
3. Right-click your GPU
4. Properties > Driver tab
5. “Roll Back Driver” (if available)
What to Expect:
– Improved frame pacing consistency
– Reduced shader compilation issues
– Better game-specific optimizations
– Potential 5-10% frametime improvement
Step 8: Cap Your FPS (Controversial but Effective)
Time: 2 minutes
Impact: High for Consistency
Uncapped framerate creates frame pacing variance and micro-stutter, especially when FPS fluctuates between wide ranges (90-144 FPS).
Why FPS Capping Helps:
– Reduces GPU power state switching
– Stabilizes frame pacing
– Eliminates variance-induced micro-stutter
– Reduces input lag variance
– Lowers temperatures and fan noise
Where to Cap FPS:
Optimal Cap = Monitor Refresh Rate – 3 FPS:
– 144Hz monitor → cap at 141 FPS
– 165Hz monitor → cap at 162 FPS
– 240Hz monitor → cap at 237 FPS
How to Cap FPS:
In-Game Setting (Preferred):
Check game’s video/graphics settings for FPS limiter
NVIDIA Control Panel:
1. Manage 3D Settings
2. Program Settings > Select game
3. Max Frame Rate → Set limit
4. Apply
AMD Software:
1. Gaming > Select game
2. Graphics tab
3. Radeon Chill: Min = Max = your target FPS
RivaTuner (Most Precise):
1. Add game executable
2. Framerate Limit → Set target
3. Scanline Sync: 0 (off)
What to Expect:
– More consistent frame pacing
– Smoother feeling gameplay
– Elimination of variance-induced stutter
– Reduced power consumption and heat
When These Fixes Don’t Work
If frametime spikes persist after all fixes:
Check for Hardware Issues:
– Run GPU stress test (FurMark, 3DMark)
– Run CPU stress test (Cinebench, Prime95)
– Check RAM with MemTest86
– Monitor SSD health (CrystalDiskInfo)
Test in Safe Mode:
– Boot Windows in Safe Mode with Networking
– Test if frametime issues disappear
– If smooth in Safe Mode, background software is the cause
Check Game-Specific Issues:
– Search “[game name] stuttering fix” on Reddit
– Check official forums for known issues
– Verify game files (Steam: Properties > Installed Files > Verify)
Update Other Drivers:
– Motherboard chipset drivers
– BIOS/UEFI firmware
– Network adapter drivers
– Audio drivers (DPC latency can cause stutter)
Consider Windows Reinstall:
If nothing works and issues affect all games:
– Clean Windows installation often resolves deep conflicts
– Last resort after exhausting all other options
Frequently Asked Questions
Why does 144 FPS still stutter?
Because average FPS doesn’t measure frame delivery consistency. Frametime spikes create stuttering even at high FPS. Example: If your frametime fluctuates between 6ms (165 FPS) and 30ms (33 FPS), you’ll see stuttering despite averaging 144 FPS. Consistency matters more than peak numbers.
Is frametime more important than FPS?
Yes, for perceived smoothness. Stable 90 FPS with consistent 11ms frametimes feels smoother than unstable 144 FPS with frequent spikes to 30-50ms. Professional players often cap FPS for consistency rather than chasing maximum numbers. Smooth delivery > high averages.
What’s a good frametime for 144Hz gaming?
6.9ms per frame = 144 FPS. But consistency matters more than hitting exactly 6.9ms. Frametimes between 6-8ms with minimal spikes (no spikes above 15ms) feels smooth. Frequent spikes to 20-30ms+ create noticeable stuttering even if average is 6.9ms.
Do I need to monitor frametime constantly?
No. Use frametime graphs to diagnose issues, identify patterns, and verify fixes work. Once your system is stable and gameplay feels smooth, you don’t need constant monitoring. Bring up the graph if stuttering returns to identify what changed.
Can VSync fix frametime spikes?
No. VSync caps framerate at monitor refresh rate but doesn’t fix the causes of frametime spikes (GPU saturation, CPU bottlenecks, thermal throttling, etc.). VSync can actually worsen stuttering if frametime drops below refresh interval (e.g., 16.6ms for 60Hz), causing frame doubling and worse stutter.
What causes random frametime spikes every few minutes?
Usually background processes: Windows updates downloading, antivirus scans, file indexing, RGB software polling, or browser activity. Check Task Manager during spikes to identify which process is consuming resources. Disable or schedule these activities outside gaming hours.
Should I upgrade the CPU or GPU to fix frametime spikes?
Not necessarily. Most frametime issues are configuration problems, not hardware limitations. Fix GPU saturation (lower settings/enable DLSS), clear shader cache, disable overlays, and optimize thermals before upgrading. If GPU usage is 100% and lowering settings doesn’t help, GPU upgrade makes sense. If one CPU thread is maxed while others are idle, CPU upgrade helps, but many thread bottlenecks can be reduced with setting adjustments.
Why do some games stutter on the first playthrough but smooth out later?
Shader compilation. DirectX 12 and Vulkan games compile shaders during gameplay the first time you encounter new effects, areas, or lighting conditions. Subsequent playthroughs use cached shaders, eliminating compilation stutter. This is normal behavior in modern games, not a problem to fix.
Related Troubleshooting Guides
If it’s Windows-specific: Read Fix Windows 11 Stuttering in 20 Minutes if your stuttering started after a Windows update or is tied to Windows 11 features like MPO, Game Bar, or Memory Integrity.
If FPS is actually low: Read Low FPS on High-End PC? Fix It in 15 Minutes if your average framerate is consistently low (30-60 FPS) rather than high FPS with stuttering. Different problems, different solutions.
If you need hardware diagnosis: Read How to Tell If You Have a CPU or GPU Bottleneck to verify whether your hardware is performing correctly before assuming frametime issues are the problem.
If you’re checking settings: Read 7 Critical PC Settings to Check Before Buying New Parts to rule out configuration issues before assuming hardware upgrades are needed.
If multiple games stutter: Read Stuttering at 144 FPS? Fix It in 15 Minutes for system-wide stuttering fixes that apply across all games.
Final Takeaway
Frametime spikes cause high-FPS stuttering because average FPS doesn’t measure frame delivery consistency. One delayed frame creates visible hitching even when your FPS counter shows 144+.
The most common causes are GPU saturation (98-100% usage), CPU thread bottlenecks, shader compilation, thermal throttling, storage bottlenecks, overlays, and driver issues. Most are fixable through configuration changes, not hardware upgrades.
Start with the highest-impact fixes: lower GPU load to 85-95% usage, clear shader cache, check thermals, disable overlays, and update drivers. These address 90% of frametime spike issues.
Smooth gameplay isn’t about maximum FPS, it’s about consistent frame delivery. Stable 90 FPS with flat frametimes beats unstable 144 FPS with frequent spikes every time.